Wednesday, January 25, 2023

How to Fix It When Windows 11 Is Stuck in Airplane Mode


When Airplane mode is enabled, wireless connections like Wi-Fi and Bluetooth are shut down. This is normally what you want in some situations, but if you can't turn Airplane mode off, you won't have access to wireless networks or devices.

This guide is for Windows 11. If the screenshots or steps don't match up exactly with what you see on your computer, you might not be running the same build that these directions are based off.

Why Can't I Turn Airplane Mode Off?

Depending on your Windows device, Airplane mode can be controlled through software or a physical switch. If there's a problem with either, the feature might remain on when you want it off.

Diagnosing why Airplane mode is stuck in the 'on' position can be difficult, but the steps below will walk through various ways to turn off Airplane mode and identify issues which could be causing it to get stuck.

Do You Really Need to Turn Off Airplane Mode?

Something to keep in mind before following these steps is it's possible for Bluetooth or Wi-Fi to be off, and therefore not working, and for Airplane mode to be off. In other words, if you can't reach the internet, or a Bluetooth device isn't working, it might have nothing to do with Airplane mode.

One way you can confirm Airplane mode is on is if you see the plane icon by the clock. If you don't see that, and none of the Airplane mode toggles appear to be on (e.g., in Settings), but you still can't get online, it's better to address this as a Windows 11 Wi-Fi issue. There could be a physical switch on your laptop for Wi-Fi which prevents Wi-Fi from working even if Airplane mode is off.

It's also important to know how Airplane mode works. You don't need to shut it off to use the wireless radios. When Airplane mode is turned on, things like Wi-Fi and Bluetooth devices are instantly disconnected. However, you can manually enable them without turning off Airplane mode.

For instance, if Airplane mode is currently on, enabling and using Bluetooth won't shut it off, and the plane logo will remain on the taskbar. The same is true for Wi-Fi. You can think of Airplane mode as a shut-off-everything-right-now kind of button, not a permanent kill switch.


How to Get Airplane Mode Off If It's Stuck

If you've already tried to simply turn off Airplane mode, but it doesn't actually shut off, there are a number of things you can try.

Turning off Airplane mode doesn't necessarily turn on Wi-Fi or Bluetooth. You might have to manually enable those things once Airplane mode is finally disabled.

  1. Restart the computer. In many circumstances, a tech problem that doesn't have a clear cause, can be resolved with a simple reboot.

    One way to restart Windows 11 is to choose Restart from the power menu on the bottom-right side of the Start menu.

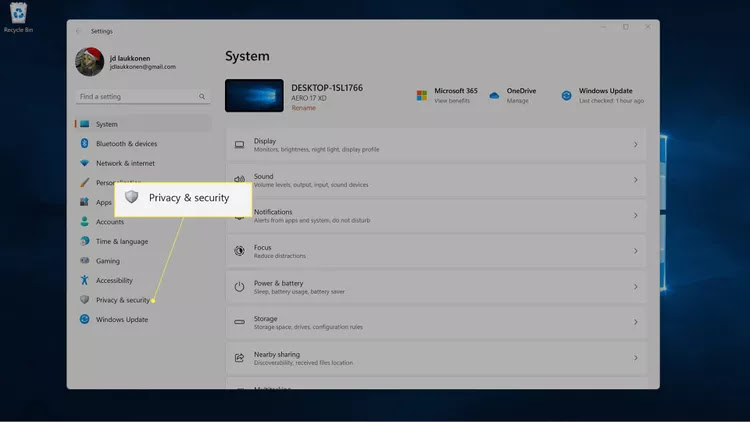
  2. Try turning off Airplane mode a different way, like from within Settings (get there with WIN+i). You can find it in the Network & internet section. 


    If Settings is how you always disable Airplane mode, try instead from the desktop. Select the volume/network area next to the clock, and then select the Airplane mode button.

    How to Use Quick Settings in Windows 11                                                                                                                                                                                                                                                                          


Select the airplane button if your keyboard has one. Laptops with this button will toggle Airplane mode on or off when it's pressed.

Disable and then enable the Airplane Mode Switch Collection device in Device Manager (if you see it; not all computers have one). Doing this should refresh Windows 11's awareness of Airplane mode, letting you disable it normally.

To do this, open Device Manager, expand the Human Interface Devices category, and then disable the device by right-clicking it and choosing Disable device. Once it's fully disabled, right-click it once more and choose Enable device


Uninstall the network device and then reboot to have Windows automatically reinstall it.

This is also done through Device Manager. Expand the Network adapters category and then right-click the Wi-Fi adapter to find the Uninstall device option.

Run the built-in network adapter troubleshooter to have Windows attempt to identify and fix the problem automatically.

Get there through Settings: System > Troubleshoot > Other troubleshooters. Select Run next to Network Adapter


  1. Update the network drivers. An outdated or missing driver might be causing the problem. A driver updater tool is the easiest way to check.

  2. Update BIOS, if an update is needed.

  3. Reset Windows 11. This will return the OS to its factory default settings and fix any software-related issues that are preventing Airplane mode from turning off.

    This option is in Settings: System > Recovery > Reset PC.

FAQ
  • How do I turn on Airplane mode on Windows 11?

    To toggle Airplane mode on or off, select the Network icon in the Windows 11 taskbar and select Airplane mode. Some keyboards also have an Airplane mode button.

  • Do I need to turn off my electronics on an airplane?

    No. When taking electronics on a plane that can connect to the internet, put them in Airplane mode during take-off so that they don't interfere with airport equipment.

  • How do I charge my phone or laptop on a plane?

    Airports have free charging stations, and some airlines provide power outlets or USB ports in the seats. If you have a long trip, bring a portable USB charger and a portable laptop battery charger just in case. Some planes have DC power adapters, so you should also bring a DC to AC power converter.


    Facebook 

    21thsoft 

How to Fix Bluetooth Devices Not Showing in Device Manager for Windows


There are plenty of uses for Bluetooth on your computer. You can connect your headphones, speaker, keyboard, or any other device. You can even share files with nearby devices. So, if Bluetooth is missing from Device Manager, you’ll have a hard time managing your Bluetooth devices.

If this has happened to you, there’s no need to fret, as one or more of the below solutions will help you bring Bluetooth back to Device Manager.


Show Hidden Devices

There’s a chance Bluetooth is not missing from Device Manager, but Windows somehow decided to hide it from the list.

To check for hidden devices, launch Device Manager and open the View menu. There, click Show hidden devices and check if Bluetooth is now visible. If you still can’t find it, move on to the next fixes.


Reconnect the Bluetooth Adapter

If you’ve connected a Bluetooth dongle as a way to add Bluetooth to your computer, the driver might be missing because of faulty hardware. Reconnect the adapter or try another USB port and check if it’s now showing in Device Manager.

Additionally, try to connect it to another computer to determine if the adapter is still working or if you should buy a new one.

3. Update USB Drivers

If the Bluetooth adapter is working on another computer, your issue might be caused by an outdated or corrupt USB driver.

Open Device Manager and expand the Universal Serial Bus controllers list. There, right-click the driver and select Update driver. Windows will search for a compatible driver version and install it.


Check Flight Mode

On a Windows computer, enabling Flight Mode is a quick way to disable wireless communications such as Wi-Fi, Bluetooth, or NFC. So if there’s something wrong with Flight Mode on your computer, it could cause Bluetooth drivers to miss from Device Manager.

Launch Action Center and check if Flight Mode is turned off. If it’s already turned off, enable it for a couple of minutes and turn it off again. If you can’t turn it on and off from Action center, there are more ways to control Flight Mode on a Windows computer.

5. Run the Bluetooth Troubleshooter

If Bluetooth is still missing from Device Manager, you should use the built-in Bluetooth troubleshooter to fix the problem.

  1. Press Windows key + I to bring up Windows Settings.
  2. Go to System > Troubleshoot > Other trouble-shooters.
  3. From the Other list, click Run next to Bluetooth


Run an SFC Scan

Bluetooth could be missing from Device Manager because a system file associated with its functionality got corrupted or damaged. Running the System File Checker should fix these files.

7. Check Bluetooth Service

While the Bluetooth service is running in the background and usually requires no attention, sometimes it could malfunction, causing Device Manager to stop showing Bluetooth drivers. In this case, you should take a look at the Bluetooth service.

In the Start menu search bar, search for services and select Run as administrator. Then, in the Services window, locate and open Bluetooth Support Service.

Take a look at its Status and check if it’s Running. If the service is already running, you can click Stop > Start to restart it.


Bring Bluetooth Back on Windows

On a computer, Bluetooth makes your life easier as you don’t have to worry about cable management or use USB adapters to connect peripheral devices. With Bluetooth showing again in Device Manager, you can upgrade your audio setup by connecting multiple Bluetooth speakers at once.


Facebook 

21thsoft 

How to Turn On/Off Smart App Control in Windows 11


What to Know

  • Settings > Privacy & security > Windows Security > App & browser control > Smart App Control settings, and select On to turn on or Off to turn off. 
  • Smart App Control can be switched from Evaluation to On, but it can’t be switched from Off to On without performing a clean installation of Windows. 
  • Turning Smart App Control off is permanent, as it can only be turned back on when installing Windows.

This article explains how to use Smart App Control in Windows 11, including how to turn this feature on and off.

How to Use Smart App Control on Windows 11

To use Smart App Control on Windows 11, you need to have Windows 11 version 22H2 or newer installed. If your Windows is outdated, this feature won’t be available, and you’ll have to update Windows before you can use it. If Windows is fully updated, this feature will operate automatically.

If you had Windows 11 installed prior to the release of Windows 11 version 22H2, Smart App Control will be off by default. To turn Smart App Control on in that case, you need to perform a clean reinstallation of Windows.

Smart App Control has three states: on, evaluation, and off. When Windows 11 is first installed, this feature starts in evaluation mode. This mode allows it to determine over time if it can provide you with valuable protection without getting in the way. If it determines that it can, it will automatically turn on. If it determines that it’s getting in the way, it will turn off.

If Smart App Control is on or in evaluation mode, it will check every app you run to see if it’s dangerous. If it determines the app is dangerous, it will block the app automatically and provide you with a message. There is no option to run the app anyway, so the process is entirely automated aside from providing you with a message.

How to Turn on Smart App Control on Windows 11

Smart App Control starts out in evaluation mode, which is a trial period where it’s on but it’s also trying to determine whether or not it’s necessary. During this period, you can choose to switch it on and end the evaluation period.

If Smart App Control is turned off, you can't use these instructions to turn it on. First, perform a clean installation of Windows 11, then follow these instructions.

Here’s how to turn on App Control on Windows 11:

Open Settings and click Privacy & security


Click Windows Security


Click App & browser control


Click Smart App Control settings


 Click On


How to Turn Off Smart App Control on Windows 11

Smart App Control can be turned off at any time if you find it’s causing problems or you just don’t want to use it. This may open you up to danger from malicious apps though, and it isn't easy to turn back on if you change your mind.

When you turn off Smart App Control in Windows 11, it is permanently disabled and you can't turn it back on. The only way to turn this feature back on is to perform a clean installation of Windows 11.

Here’s how to turn off Smart App Control on Windows 11:

Open Settings and click Privacy & security


Click Windows Security


Click App & browser control


  Click Smart App Control settings. 


Click Off


This is permanent, so make sure that you actually need to turn this feature off before you proceed.

What Is Smart App Control in Windows 11?

Smart App Control is a security feature that was introduced in Windows 11 version 22H2, which is also referred to as the 2022 Update. This feature is designed to prevent potentially unsafe apps from running on your computer.

Unlike older security features that just checked a couple of aspects of an app, like whether or not an app was signed, Smart App Control relies on a massive database of signals that’s updated on a daily basis. According to Microsoft, this repository contains more than 43 trillion signals that can indicate potentially dangerous software.

Whenever a new app runs on your PC, Smart App Control leverages artificial intelligence to check for signals that the app may be dangerous. If it determines that the app is unsafe, it prevents the app from running and provides you with a message that the app was blocked. You then have the option to provide feedback if you think Smart App Control was wrong, or to visit the Microsoft Store to look for safe apps.

FAQ
  • What is Windows Application Control?

    Microsoft Windows Defender Application Control is a software-based security layer in Windows designed to prevent malicious infections by ensuring only approved code runs. Application Control lets IT managers control the applications that run on managed devices.

  • Should I turn on Windows App and Browser Control?

    You should turn on App and Browser Control settings if you want to block specific applications and websites on your Windows PC. To enable the feature, navigate to the Windows Security app, select App & browser control, and select Turn on.

  • What are examples of application controls?

    Application controls block or restrict specific applications that may put data at risk if allowed to run. Examples of application control practices include checks for authentication, authorization, and validity as well as input and forensic controls.


Facebook

21thsoft 
 

How to Turn On/Off Narrator in Windows 11


What to Know

  • To toggle Narrator on or off: press the Windows key + Ctrl + Enter.
  • You can also turn off Narrator by right-clicking Narrator in the System Tray and selecting Turn off Narrator
  • To access Narrator settings: Navigate to Settings > Accessibility > Narrator.

This article explains how to use Narrator in Windows 11, including how to turn this feature on and off.

How to Turn Off Narrator in Windows 11

Narrator can be turned off on Windows 11 using a keyboard shortcut and also through the Settings app. The keyboard shortcut is the fastest option, but it’s important to only use it once, as the same key combination will also turn Narrator back on if you do it again.

To quickly toggle Narrator off in Windows 11, press the Windows key + Ctrl + Enter. When you hear, “Narrator disabled,” you can release the keys. Narrator will remain disabled until you turn it on again.

If that doesn’t work, you can also turn off Narrator through the Settings app:

Open Settings, and click Accessibility


Click Narrator


Click the Narrator toggle to turn it off. 


Optional: Click the Keyboard shortcut for Narrator toggle to turn it off, if you want to avoid turning this feature on accidentally in the future.

If you do use this feature occasionally, leave this toggle on. 


How to Close Narrator in Windows 11

When Narrator is active on Windows 11, you should either see the Narrator window on your screen or a Narrator icon in the system tray. Closing the Narrator window also closes Narrator, which is why you’ll always find its icon in the system tray whenever this feature is active.

That means you can also turn Narrator off by closing the Narrator window if it's open on your screen or selecting the option to turn it off from the icon in the system tray.

If you have a lot of items in your system tray, you may not see Narrator even though it's there. In that case, you can choose to show or hide specific system tray icons.

Here’s how to close Narrator from the system tray:

Right click Narrator in the system tray. 


Click the ^ (show hidden icons) if you don’t see the Narrator icon.

Click Turn off Narrator


Narrator will close.

How to Turn Narrator On in Windows 11

You can activate Narrator quickly by pressing the Windows key + Ctrl + Enter. This is the same key combination that’s used to turn Narrator off, but using it to turn Narrator on also opens that Narrator window. That means if you use this keyboard shortcut to turn on Narrator, you also need to minimize the Narrator window before you can get back to what you were doing before. Closing the Narrator window will also shut Narrator off, so you need to minimize it instead.

Here’s how to turn Narrator on in Windows 11:

  1. Press Windows key + Ctrl + Enter.

  2. Narrator will turn on, and you will see the Narrator Home screen.

    Optional: Deselect the Show Narrator Home box if you don’t want to see this screen every time you open Narrator. 


    Click Minimize


    Narrator is now on and will start reading your screen, so you can go back to what you were doing before.

    How to Turn Narrator On Through Windows 11 Settings

    You can also turn Narrator on through the Settings app, which provides you with some additional options.

    Here’s how to turn Narrator on through Windows 11 Settings:

    Open Settings, and click Accessibility


    Click Narrator


    Click the Narrator toggle to turn it on. 


    Click anywhere on the Narrator tile in the Use Narrator section to expand it.


     Click the Start Narrator before sign-in box if you want Narrator to read the sign-in screen every time your computer is turned on. 


    If multiple people use your computer, everyone will hear Narrator on the sign-in screen even if they don't have Narrator turned on in their own settings.

    Click the Start Narrator after sign-in box if you want Narrator to start reading the screen after you’ve signed into your account.                                                                                                                                                                                                                                                                                                             

    You'll need to sign into Windows without assistance from Narrator if you select this option without also selecting the previous one.

    You can now click the X in the upper right corner of the window close Narrator settings. 


    What Is Narrator in Windows 11?

    Narrator is an accessibility feature that’s designed to help blind and vision-impaired users. This screen reader is built into Windows, so you don’t need to download or install anything to use it. It’s turned off by default, but you can toggle it on at any time by pressing the Windows key + Ctrl + Enter.

    Narrator is a multi-function screen reader that goes beyond just reading text documents. This app is capable of reading everything on your screen, and it reads whatever item you currently have selected. In that way, it helps blind and visually-impaired users navigate Windows, change Windows settings, and open and close apps.

    For example, if a user has selected a minimize window button, Narrator will read the button text, and the user can press the enter key to execute that function.

    When an app is open, Narrator also reads menu options and other controls within the app. It’s also useful as a regular text-to-speech app, as it will read various documents, websites, and other information that’s displayed on the screen.

    FAQ
  3. Can I change the narrator voice in Windows 11?

    Yes. To change the Windows narrator voice, go to Settings > Accessibility > Narrator and select the Voice dropdown to choose a voice. Select Add voices for more options.

  4. Is there a voice assistant for Windows 11?

    Yes. You can use Cortana in Windows 11, but it's not active by default. Open the Cortana app and sign in to begin using the voice assistant.

  5. How do I use voice typing in Windows 11?

    To use voice typing in Windows 11, press the Windows key+H. Alternatively, use a voice typing app like Google Voice Typing.


  6. Facebook

    21thsoft 
     

How to Fix Windows 11 Ethernet Driver Problems


The correct Ethernet driver is necessary for Windows 11 to properly access a wired network. Problems with this driver results in errors, issues using the internet, and often no internet connection at all.

This guide is almost exclusively for driver-related issues with the Ethernet card. If you're not confident the problem you're having is with the driver, check out these general tips for when you can't reach the internet.

What Causes Problems With the Ethernet Driver

Issues with device drivers are often the cause of hardware problems because drivers are necessary components for your computer to properly communicate with hardware. Your network interface card is a physical device much like everything else used by your computer, so it, too, can run into driver issues.

Sometimes, the Ethernet driver becomes so outdated it runs into problems only an update can fix. In other cases, the driver might have become corrupted due to a software conflict or virus.

How to Fix Windows 11 Ethernet Driver Problems

It's tempting to focus only on the Ethernet driver when troubleshooting this problem. However, since there could be slightly different reasons for the Ethernet problem which aren't directly tied to the driver, the following are a mixture of things you can try to fix Ethernet problems.

  1. Restart the computer. Rebooting is a common first step for most tech issues, and it might also be all you need to do to fix the Ethernet problem.

    One easy way to restart Windows 11 is to right-click the Start button and go to Shut down or sign out > Restart.

  2. Switch to Wi-Fi, if possible. If your computer can access the wireless network, then it makes sense to continue with these steps to address an Ethernet-only issue.

    If you can't reach the Wi-Fi network either, then there are likely broader problems at play. Continue with the relevant steps below that don't apply to just a wired network, but then also troubleshoot Wi-Fi problems.

  3. Force Windows to reinstall the Ethernet driver. To do this, open Device Manager (right-click Start to find it), expand the Network adapters group, right-click the Ethernet device, and go to Uninstall device > Uninstall.

    After a reboot, Windows will automatically identify the device and install the driver again. 


    1. While you're in Device Manager, double-check the Ethernet device is enabled. If there's a black arrow next to it, then it's simply disabled, and the solution is easy: Right-click it and choose Enable device.

    2. Run the built-in network troubleshooter, located here: Settings > System > Troubleshoot > Other troubleshooters. Select Run next to Network Adapter to have Windows attempt to identify and fix the issue.

    3. Reset the Windows 11 network settings. Doing this will delete and then reinstall the Ethernet adapter, and reset various network settings to their defaults.

      This tool is in Settings as well: Settings > Network & Internet > Advanced network settings > Network reset > Reset now


      1. Run a driver updater tool to check for Ethernet driver updates. The existing driver might be missing entirely, or corrupted or outdated, and that could be causing the Ethernet problem.

        A driver updater can still work even if you don't have internet. Look through the list linked above for one that works offline, and then follow that app's directions. It'll involve identifying what driver you need, downloading the driver from a working computer, and then copying it to Windows 11 to install it.

      2. Perform a netsh Winsock reset. This isn't directly related to the Ethernet driver, but it can be helpful for general network connection issues.

        Follow that link to learn more about what this does and how to do it. If you're already comfortable using the Command Prompt, run this command and then restart your PC:

        netsh winsock reset
        
      3. Plug the cable into a different Ethernet port on the router, and ensure both ends, including the one attached to your computer, are secure. Again, this has nothing to do with the device driver, but it could be the fix for a general issue of there being no wired internet.

        You don't need to buy a new router if just one port is bad, since most people can live with a non-working port, so long as there are others which can be used instead.

        FAQ
        • How do I update Ethernet drivers in Windows 10?

          To update drivers in Windows 10, launch Device Manager from the Control Panel or use the WIN+X keyboard shortcut. Select Network Adapters to expand the category > right-click the driver > and choose Update driver.

        • How do I reinstall Ethernet drivers in Windows 10?

          Reinstall the network driver automatically from Device Manager > Network Adapters. Right-click the adapter > choose Uninstall > reboot your computer. If you're having trouble with a driver update, you can also roll back a driver and reinstall a previous version by right-clicking the driver and selecting Properties > Roll Back Driver


          Facebook 

          21thsoft