What to Know
- Settings > System > Power > Screen and sleep. Edit the When plugged in, turn off my screen after value.
- Alternatively: Control Panel > Hardware and Sound > Power Options > Choose when to turn off the display.
- More technical approach: powercfg -change -monitor-timeout-ac 60 command (60 = 1 hour).
This article explains how to change the Windows 11 screen timeout setting so the monitor will turn off after a different duration. Your options span from one minute to five hours, or you can stop the display from turning off at all.
How to Change the Windows 11 Lock Screen Timeout
Below are three ways to do this, but we recommend this first method for most people since it's the easiest.
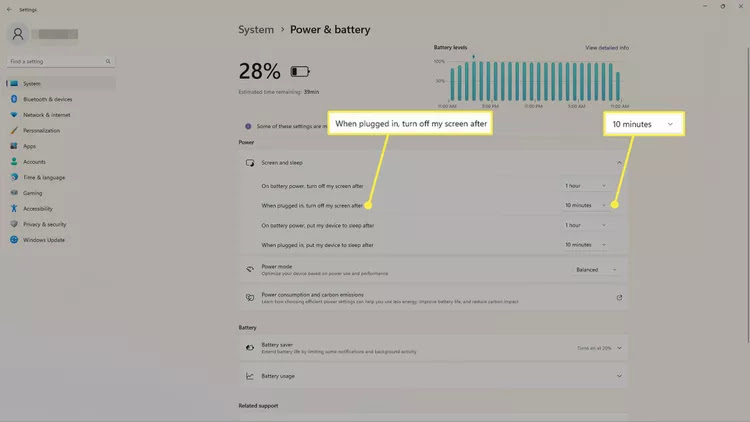
Use Settings to Edit Power Settings
The power options in Settings is one way to adjust how long Windows 11 stays awake.
In the Windows taskbar, select the Start Menu and open Settings.

Select Power & battery.
Another way to open power settings is through the Power User Menu. Right-click the Start Menu and choose Power Options.

Select Screen and sleep.
The ms-settings:powersleep Run command can be used to jump right to this screen.

Choose a time next to When plugged in, turn off my screen after. If your device has a battery, you'll see another option (not pictured here) for when to turn the screen off when on battery power.
Use Control Panel to Edit Plan Settings
You can customize your power plan in Control Panel to choose when to turn off the display.

Select Hardware and Sound.

Select Power Options.
A quick way to complete this step and open the Power Options Control Panel applet, is to execute powercfg.cpl from the Run dialog box.

On the left, select Choose when to turn off the display or Change when the computer sleeps.

Next to Turn off the display, select the menu to pick a different duration.

Select Save changes.

Use the Powercfg Command
Another way to keep the screen active, or to change the monitor timeout so it turns off faster is through a specific command at the command line. This is easy to do even if you've never executed a command before.
-
Open Terminal. You can find it through a search or by right-clicking the Start button.
-
Enter the command as it's written below to change the screen timeout when the computer is plugged in.
Edit 60 to whatever you want the time to be, in seconds:
powercfg -change -monitor-timeout-ac 60

A similar command is used for when the computer is on battery power:
powercfg -change -monitor-timeout-dc 60This command works in Command Prompt and PowerShell, so it doesn't matter which tab you open in Terminal.
-
Press Enter to execute the command. The change will take place immediately.
The Differences Between Screen Timeout and Sleep
At a glance, a computer that's asleep might look the same as one that's awake but with the display turned off. In reality, these are two different things.
This means the duration your computer waits before turning off the display can be different from the duration that passes before it puts the computer to sleep. See our How to Change Windows Sleep Settings guide to edit how long Windows 11 should wait before going to sleep.
Editing both the display and sleep option is how you can keep your computer awake without touching the mouse.
No comments:
Post a Comment